Handtools for Cablemaking
Sure, you can just about use a match and a pocketknife and make a cable with soldered connections, but you probably
wouldn't want to do this except in a dire emergency. Emergencies aside, let's explore and discuss the tools used in cablemaking.
n.b. Most of the pictures are linked to larger versions, so if you can't quite see something, try double clicking it to see if it gets larger.
Eye Protection and Fumes
|
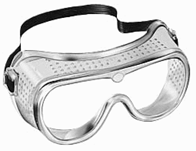
Soldering can be dangerous. A wire that is under tension can slip, and fling molten solder at you. If you
caught it in the eye, it would be painful, and likely damaging to your vision. It's
prudent to wear goggles, or safety glasses. If you wear corrective lenses, they will at
least shield your eyeballs. You have been warned.
|

|
Getting older brings with it a variety of shortcomings, some obvious, some less so. Once you cross 40,
your eyes lose some of their focal range; the ability to focus on things up close, or far away. This affects your ability to see nearby things clearly, and it may also affect your depth perception, with the result of having difficulty lining up solder, work, and soldering iron. Bifocal and trifocal or continuous lenses are the usual outcome.
But, sometimes that isn't enough, and a headworn binocular magnifier becomes a requirement. These are most easily found at a hobby shop.
|
|
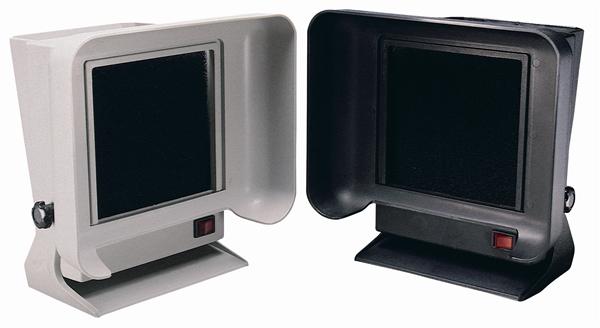
Soldering generates smoke as the heat of the operation vaporizes the rosin flux in the solder.
This isn't particularly harmful, although it is not advisable to inhale it. Some techs have a small fan
nearby to pull the rosin smoke away. There is also concern by some about lead vapor in the smoke,
but the soldering temperature is much cooler than the boiling temperature of lead,
which you'd have to reach in order that the lead vaporize.
|
Soldering Irons

Common-Ordinary Soldering Iron
|
Soldering Gun
|

Weller Soldering Iron
|
Weller Soldering Station
|
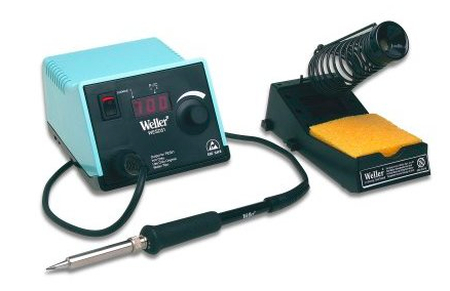
Weller Digital Soldering Station
|
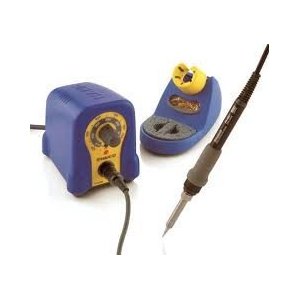
Hakko Soldering Station
|
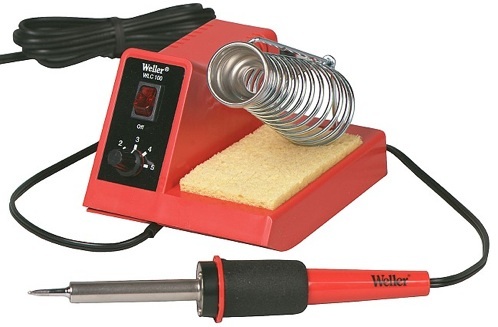
Weller/Ungar Soldering Station
|

Edsyn Soldering Station
|
There are many different types, but the ones that work best are thermostatically controlled so that they deliver heat to the connection on-demand. When you touch the tip to the work (connection), the work draws heat from the tip, cooling it. The controlled heat iron uses a thermostat to detect this, and rapidly raises the tip temperature back to the set point.
Cheap irons, such as the one shown in R1C1 of the photo grid are always on, and they rely on overkill to heat the connection, and often, this results in melted insulation. In a pinch, sure, but this isn't a good tool for someone just learning the ropes.
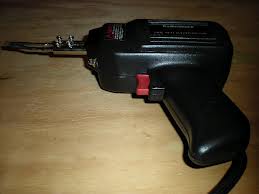
The soldering gun, shown in R1C2 of the grid, was popular in the 1950s. It heats rapidly and cools rapidly, which is attractive since this makes it more difficult to burn something or start a fire.
But the
GOTCHA
is that the tip overheats in seconds and gets far hotter than needed, again resulting in melted insulation.
NOT RECOMMENDED FOR CIRCUIT BOARD WORK
The Weller WP-35 iron, shown in R1C3 is affordable, but it is NOT thermostatically controlled. It's a reasonable minimum tool that gets the job done.
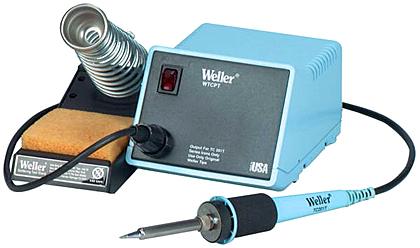
The Weller WTCP soldering station, R1C4 has been around for decades, although it has gone thru industrial design changes, it's the same basic tool. These tools have a transformer in the base station that takes the line voltage down to 24v to operate the iron. Change the tip to change the temperature.
Digital Soldering Stations, R2C1, have an adjustment in the base station to let you set
the temperature. They tend to be expensive.
The Hakko station, R2C2, is relatively affordable and works well. There are many different tip sizes and geometries available. The knob adjusts the temperature.
The Weller/Ungar station, R2C3, is also pretty affordable, and has a knob to set the temperature. Ungar used to make the woodburner-style irons, and then Weller bought them.
The Edsyn station, R2C4 is another example of an adjustable heat soldering station. This is a good tool, and tips are widely available.
Radio Shack just introduced several new soldering tools, including a soldering station. These are priced to be affordable. I purchased one of the dual-heat units,
and while I've confirmed that it gets hot and melts solder, I suspect it does not have a thermostat.
Battery operated soldering irons have been around for a long time, and they're certainly handy if you're up a ladder working on something, but they lack tip mass, and the battery always seems to die 2 connections before you're done. YMMV.
Tip Geometry
 chisel/screwdriver tip

long screwdriver tip
|

Beefy screwdriver tip

conical tip
|
The iron's tip is how it transfers heat to the work, and generally speaking, for soldering connectors, you want a chisel shaped tip so that you can use the flat side to get good heat transfer when you're soldering. For larger connectors, and/or larger conductors, extra mass in the tip helps you work faster. For circuit board soldering, you may want/prefer a smaller conical tip.
Tip Temperature
My preference is 800-degrees, however I may switch to 600-degrees if I'm working on something old, fragile, or with teeny-tiny-skinny traces on a circuit board. I find that 800-degrees lets me work faster. Keep in mind that I've been soldering for over 50 years!
If you're just beginning, you might want to start at 700-degrees, with a 600-degree tip for circuit board work.
|
Solder
We'll cover this in more detail in the workshop.

|
If you need to buy a roll of solder, then try to buy flux cored 63-37 alloy. Westlake Electronics does not sell this, but Mouser and Digikey do (see
Resources
). You may be able to get this at Fry's.
|
| If you can't find 63-37, then 60-40 works fine (63-37 works better).
Good brands are: Ersin Mulicore, Kester, Alpha Metals, and AIM. You want a solder that has a flux core of activated rosin or mildly activated rosin. If you're going to be soldering wires that have been out and about for awhile, then activated rosin works better.
Do not buy acid core solder or soldering paste. They will ruin your life.
Solder Gauge/Diameter
Fatter solder takes less to make a connection, but is harder to control in small amounts, say if you're soldering a mini-XLR. 18-AWG is ok, but my preference is 22-AWG or .062-in diameter. I use 14-AWG (with a fat 800-degree tip) for filling the solder cups in XLR connectors. Don't bother with the teeny-tiny stuff (.031 dia) unless you're doing SMT or really teeny stuff on a PCB.
|
Wire Cutters

Micro Bevel

Flush

Ultra Flush
|
The diagonal cutter has been the standard-issue wire cutting tool for years. You can tell it by looking at the geometry of the blades: two symmetrical bevels that come together when the jaws are closed. Diagonals work well for cutting wire, but less well for stripping it (removing the insulation). Lindstrom calls this blade geometry "micro-bevel."
A refinement to the diagonal cutter is the
flush-cutter.
The difference here is the geometry of the cutter blades. The angles of the faces are quite different, one face is more like 45-degrees, and the other is more like 90-degrees to the axis of the wire. The difference is the appearance of the end of the wire after it has been cut. But the real benefit here is wire stripping. You can use the 90-degree face to push the insulation off of the wire, whereas with a conventional cutter, you drag it off of the wire.
Flush cutters are easily damaged, so hide yours from your guitar player friends, and don't you try cutting guitar strings with them. There are two blade geometries available from Lindstrom,
Flush and Ultra-Flush. Flush blades resist dulling somewhat better, and are a bit harder to damage. Lindstrom has a good guide on
How To Choose Cutters.
Lindstrom's cutters are precision tools, and priced accordingly.
|
Wire Strippers

Stripper/Crimper
|
Wire strippers come in all sorts of shapes, sizes, and prices. The intent is to remove the insulation from the wire without harming (by nicking) the conductor. This could be a plier-like device, with notches cut in the blades to clear the wire. You clamp the wire in the notch, squeeze the handles, and pull the wire out of the handle. Usually the insulation comes off in the process. Often these strippers are part of a crimping tool.
|
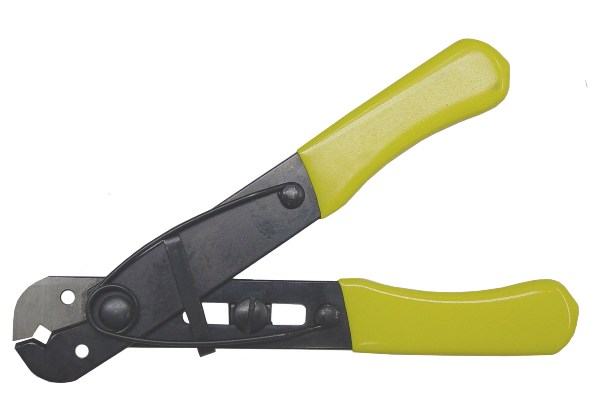
Miller Stripper
|
Another variant is made by K. Miller and company. It's a yellow handled plier kind of tool, with a notch cut in each blade. A screw lets you adjust the separation of the blades for the diameter of the wire that you're stripping.
If the tool is fairly new, and you have good muscle-memory, you can learn to strip wires safely without having to use the adjustment screw. These are fairly available and inexpensive. You could buy several and set them individually for different wires.
|

Notched jaw stripper
|
A variant on the Miller stripper has a number of notches in the jaws that correspond to different wire sizes.
|
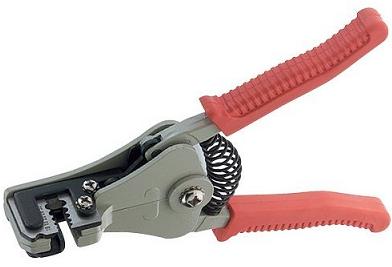
SpeedX Stripper
|
The Speed-X stripper (also known as StripMaster) has a serrated jaw with holes to match the wire gauge. The jaws are sectioned, and the blades are in one section, and the other section is designed to grab the insulation.
When you squeeze the handles, the wire jaws grab the wire, the jaws with the blades cut the insulation, and further squeezing makes the two halves of the plier separate, pulling the insulation off. This stripper has been around forever.
|

Stripax
|
The Strip-Ax is made by Paladin Tool. It is self adjusting, more or less, (you have to adjust it for the thickness/hardness of the insulation). You insert the wire into the opening of the jaws, and squeeze the handle. when you release, the wire is stripped.
They work really well, but they are not cheap. Worth it if you're wiring your studio or building a snake.
|
| |
You can learn to use a pair of wire cutters to strip wire. The key is muscle memory, and learning how hard you have to squeeze the jaws to cut thru the insulation without nicking the conductor. Flush or semi-flush cutters are easier to use for this, as the blades are sharper, and you can feel the change in the 'give' when the blade cuts thru the insulation. If you turn the cutter so that the oblique angle blade faces outward (towards the cut end), then once you cut thru the insulation, you relax your grip slightly and push the cutter towards the cut end, which takes the cut-off bit of insulation with it. This takes practice, but so does playing a musical instrument.
|
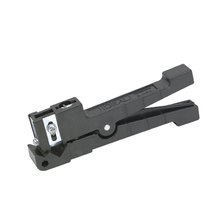
Ideal Stripper
|
This stripper is made by Ideal Industries. You can find them at Home Depot in the electrical section. Radio Shack used to sell it, but someone learned that it was useful and they took it out of their lineup. Use this tool to remove the outer jacket of the wire. That's all it does, and it does it well enough to warrant buying yet another tool. The blade can be set to just score the outer jacket, then a bit of effort makes the jacket pull away, without nicking any of the inner conductors.
|
Other Cutters
|
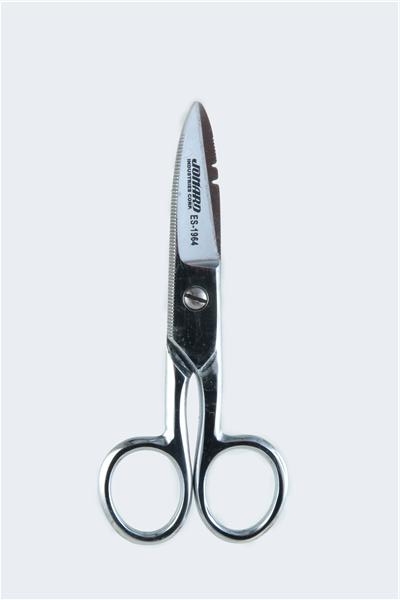
Sometimes you need something beyond what you can do with your flush cutters.
Trimming shielding braid before attaching an old-style BNC connector, or cutting through all of
the fillers used to make microphone cables more round and durable.
|
|
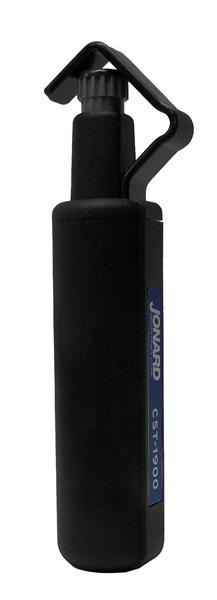
This is a round cable stripper used to remove the outer jacket from snake cables. Underneath the angled flat metal part is a depth-adjustable blade. In use, the cable fits thru the angled-metal part, which lifts to accommodate different cable sizes, and the blade is roated so it is perpendicular to the axis of the cable. The tool then rotates around the cable, making a neat, controlled depth cut through the jacket. Then you release the blade rotating lever, and the blade returns to its rest position, parallel to the axis of the cable. You pull the tool off of the cable, and the blade makes a slice along the length, so you can remove the jacket.
|
|
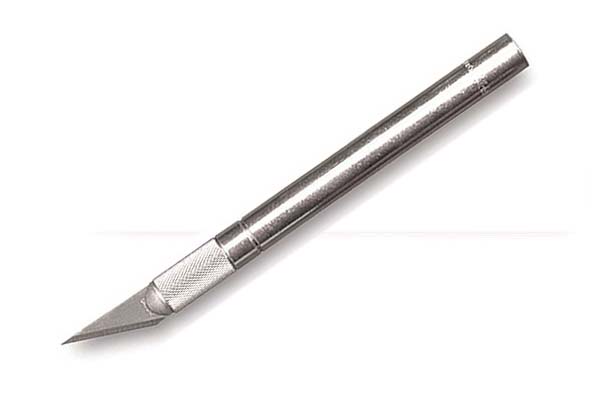
The xacto knife. A repurposed surgeon's scalpel. Sharp as all get-out. Very handy. A wide variety of different blades are available.
|
Pliers
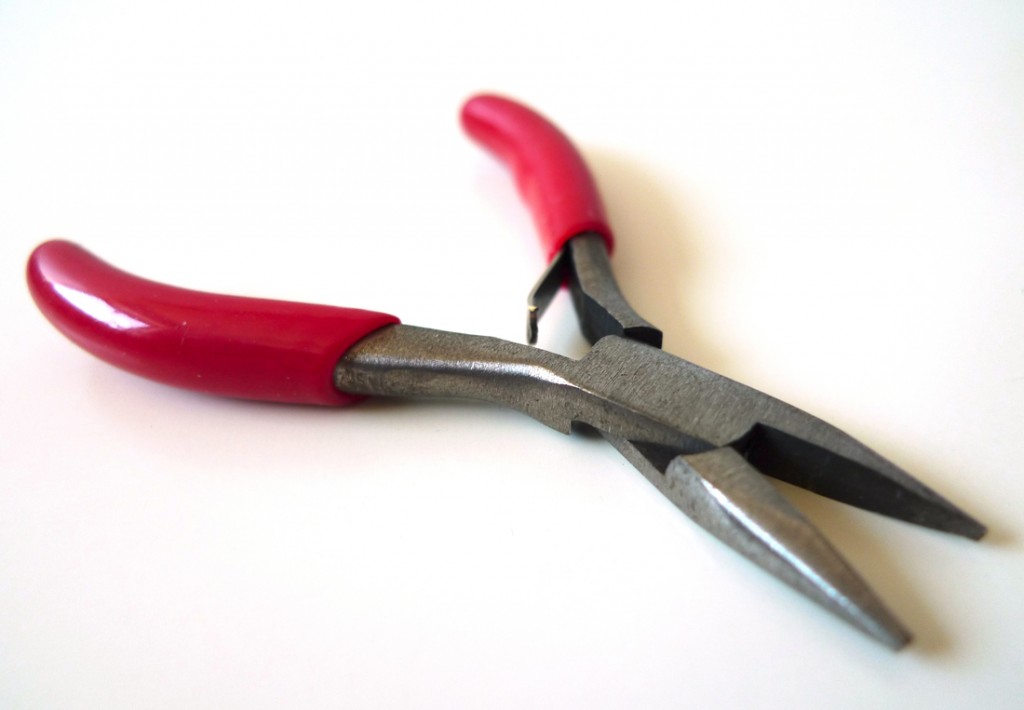
Longnose

Combination

Hemostats
|
You need pliers in this venture for two things: longnose pliers for holding a wire in place that you're soldering and combination pliers for crimping the strain relief tabs on some connectors. Using pliers to hold the wire while soldering is a dual-edged sword: the amount of pressure applied is enough to deform the insulation while soldering, and you should be able to work fast enough to not need pliers (let that be a benchmark of your soldering prowess).
Surgical hemostats (forceps) also work well, and their locking feature is a plus. Most hemostats that you can buy outside of a surgical supply are made in Pakistan, and the alloy they use is rather brittle, so buy a couple of pairs, and be careful to not clamp down on something that is too large.
|
Screwdrivers
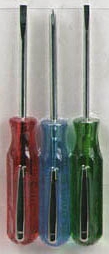
Xcelite Drivers
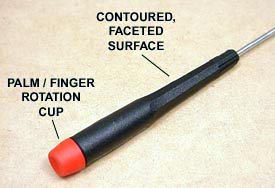
Wiha Driver
|
Some connectors have small screws for locking the insert in place, or for operating the strain relief. The Switchcraft XLR connectors do this. Note that the insert screw on these connectors is reverse threaded. The logic is that turning the screw counterclockwise, which would ordinarily loosen the screw, loosens this screw, but the screw retracts into the insert. Turning it clockwise, causes the screw to extend beyond the insert and engages the hole in the connector shell. The reason is that the screw remains captive in the insert rather than falling onto the bench and getting lost. This was a good enough idea to get them a patent.
Xcelite makes screwdrivers aimed at electronics techs, and their green and red handled drivers are useful here. Wiha makes a nicer driver, with hardened tips, and a spinner top that saves your palm if you have a lot of connectors to assemble (experience talking here; I once got a blister on my palm from excessive screwdriver usage). You want the 2mm and 2.5mm sizes. Personally, I switched to Neutrik connctors after stabbing myself in the palm with a screwdriver once too often.
|
Pointy Things
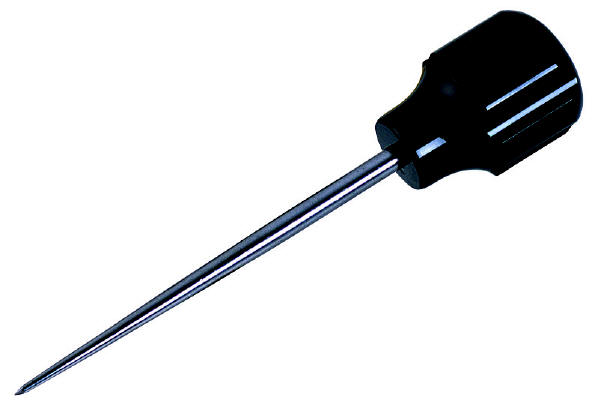
Awl

Dental Probe
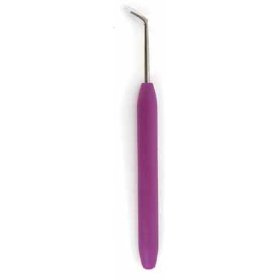
Knifty Knitter Hook
|
You use pointy things mostly to unravel braid. With single conductor coax, such as used for RF, there is a method where you work a hole into the braid, and then reach inside and pull the center conductor out, but this really doesn't work with microphone cable. The technique is to use something pointy to unravel the braid, then you get all the wire strands going in the same direction, twist and tin them. The question, then, is which pointy implement to use?
You can use an awl, commonly found in hardware stores, and used as a way of making a starter hole for a screw or nail, or for joining pieces of carpet, or as a poor-man's center punch.
You probably remember your dentist testing your endurance to pain with a dental probe. Bet you never thought of it as a soldering implement. Made of stainless steel, solder does not want to stick to it, so besides being a useful pointy thing for unraveling shielding braid, it is also useful for clearing a hole of solder after desoldering something. They come in straight, bent, and curved. Many hardware stores now carry them.
Finally, there is the Knifty Knitter Loom Hook, something I discovered courtesy of my wife, who was using it for it's intended purpose with a Knifty Knitter Loom. These have the advantage of being inexpensive, and they do the job nicely. You can find these at a craft store such as Michaels.
|
Keep Things Stationary
| When soldering, it's important that the work (thing you're soldering) remains still. There's the safety issue, and the part about the parts remaining stationary while the solder cools. Then again, it just makes it harder
when you have to chase the parts around the workbench with the soldering iron.
In no particular order, these are some of the things that I've resorted to:
- Drill holes in your workbench to insert the connector insert into.
- Try to hold it with one hand while you solder with the other. How the solder gets to the connection is an exercise left to the interested (and creative) student.
- Put the thing into a vise.
- plug it into a chassis mount connector, which has more mass and is more likely to stay put.
- Use a SolderBuddy, which is a refinement of drilling holes in your workbench.
- Grab it with a hemostat, and then park the hemostat flat on the bench and put your roll of solder onto it to keep it still.
Get the picture?
|
|
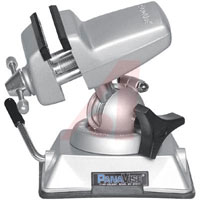
The Panavise comes in a variety of different types. The picture here is just one of many. It's a twist on
the machinist's vise, with a number of different mounting options, and different types of vises and other gripping options.
|
|
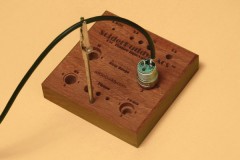
My friend, Lee Tingler makes this. The inspiration for this was seeing my piece of 2x4
with a bunch of holes drilled in it. This is considerably more refined, and it's handmade in the USA.
Lee makes a variety of different variations of this design aimed at different connectors. Be sure to check out
his VersaVice. My personal preference is to mount the SolderBuddy into a Panavise.
|
|
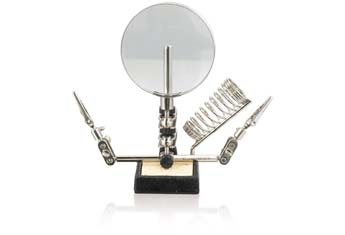
Radio Shack, the electronics 7-11, has been selling these things since I don't remember when... It's a handy tools for getting things into alignment so you can solder them together. The magnifier is handy for aging eyes.
|
Supplies
In addition to solder, you should be aware of the availability of these items, and what they're called, so
you can seem intelligent when you try to purchase them.
|
Sleeving
|
You use sleeving to insulate a wire, to prevent it from shorting to an adjacent conductor or other metallic object. Sleeving used to be called spaghetti, because it looked a lot like the familiar Italian pasta. It's just plastic or varnished fabric tubing. Today, the most common materials are teflon and PVC.
Both come in wire sizes, and it's common to purchase a size or two larger, which makes it easier to thread onto the wire.
PVC sleeving, which looks like the stuff that carries air into your aquarium, comes in wire sizes, and it's a handy substitute for shrink sleeving.
|
|
Shrink Sleeving
|
Shrink Sleeving is made from irradiated polyolefin. It's become popular as add-on insulation, and it certainly does a neater job than electrical tape (which I regard as the sign of an amateur). The most common type has a shrink ratio of 50%, meaning that it loses one-half of its diameter after shrinking. You need a heat gun to shrink it. (The heat gun is a hair dryer on steroids)
There are other types of shrink sleeving, semi-rigid which has an inner layer of glue that seals it to the wire insulation, and high-shrink, which has a 3:1 shrink ratio. I use semi-rigid to seal the outer jacket of a snake cable to the bundle of wires that exits the jacket.
You can find common-ordinary shrink sleeving at Westlake and at Fry's, and even at Radio Shack.
Semi-rigid is harder to find, Mouser and Grainger come to mind.
|
Resources
Some places where you can buy some of the items shown on this page. Note that there's no one-stop-shop for everything. I'd start local, and move outward from there.
|
Westlake Electronics
|
One of the last remaining old-school electronics distributors with counter service. Westlake's inventory favors broadcast and audio, so they're a good resource for finding tools, shrink sleeving, wire and cable, and connectors. They also have rack hardware (like panels as well as racks). A good place to start your search.
|
|
Markertek
|
Markertek has an audio/video centric market niche. They sell gear, media, wire and cable, connectors, and tools. Although they're in the east, their service is very good and they're fast. Yeah, shipping does cost money, but they're about as close to a one-stop shop as you'll get.
|
|
Otto Frei
|
Although they're probably better known in jewelry circles than in electronics, Otto Frei sells the Lindstrom cutters and pliers as well as a number of other tools that may be of use to DIY folks. They run frequent sales, so it's worth getting on their mailing list so you know when a sale is happening.
|
|
Mouser Electronics
|
These guys (and Digikey) are the reason that you can't buy small parts over-the-counter in most metro areas anymore. However bad that may be, they have an enormous catalog and a really good and complete online presence.
It's hard to beat the convenience of being able to order parts at 3AM, and then have them show up 2 days later
(at a price). Still, they have it, their customer service is really good, and the depth of their inventory is astounding. No minimum order, and they can handle credit cards if you don't have an account. For small parts (resistors, capacitors, ICs, transistors), Mouser is my first (and usually only) stop.
|
|
Digikey Electronics
|
Digikey is closer to us than Mouser, but they have a minimum order (about $50), so maybe that makes them not as convenient. They have many similar lines to Mouser. Very good customer service.
|
|
Ace Hardware
|
Your Friendly Local Hardare Man. This is probably the closest to an old-school hardware store that any of us
can easily access. While they don't have a lot of electronics specialty tools, they do have hemostats, although I can't readily find them on their website. They may also have dental tools, although, again, they're not listed as such on their website. One thing they do have is hardware: nuts and bolts, including the small ones that are handy for electronics. If you need quantity, be sure to look at the rear of the pull-out drawers/bins, as they sell boxes of 100 for a quantity price.
|
|
Radio Shack
|
They're ubiquitous, they're everywhere. Not always useful, but everpresent, and even on Sunday. In a pinch, they
might just save your bacon. Tools, soldering supplies, some wire, some connectors, and some passive components. They're mainstream enough that you could get a TL082 IC or a 555 timer IC there on Sunday.
|
|
Fry's
|
Geek-a-rama! They're not quite everywhere, but they do open on Sunday, and they have a wide selection of everything from corn chips to computer chips, with tools, and other geek-stuff in good supply. In the Seattle area, they're off of I405 at exit 5. A better shot at success than Radio Shack.
|
Last modified 11/11/2012 20:46:46.


